Chuck style rotary units for lasers come with many of the Redsail lasers or other various units from China. At first we HATED this style unit for a several reasons:
First, the unit came with NO instructions, nothing on the web site from the manufacturer.
It wasn't cheap to purchase.
We had to figure it out on our own.
Trying to use it with anything made of was mostly a failure due to heat expansion.
The roller style just seemed so much better. They too have their issues, but they were pretty straight forward.
We even did a video on how to configure a chuck style rotary unit with Autolaser in the post:
How did we fix our issue and frustration with this unit? We stopped using it.
Well at least for a period of time. Then one day we were searching for some sort of solution and came across something that we had not even considered:
Adapters!
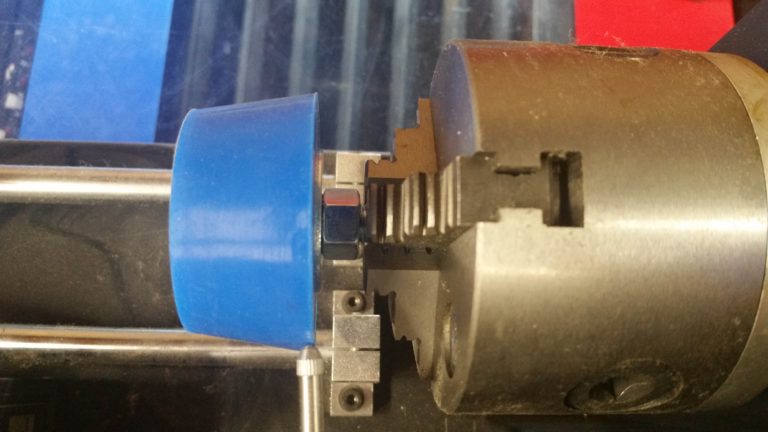
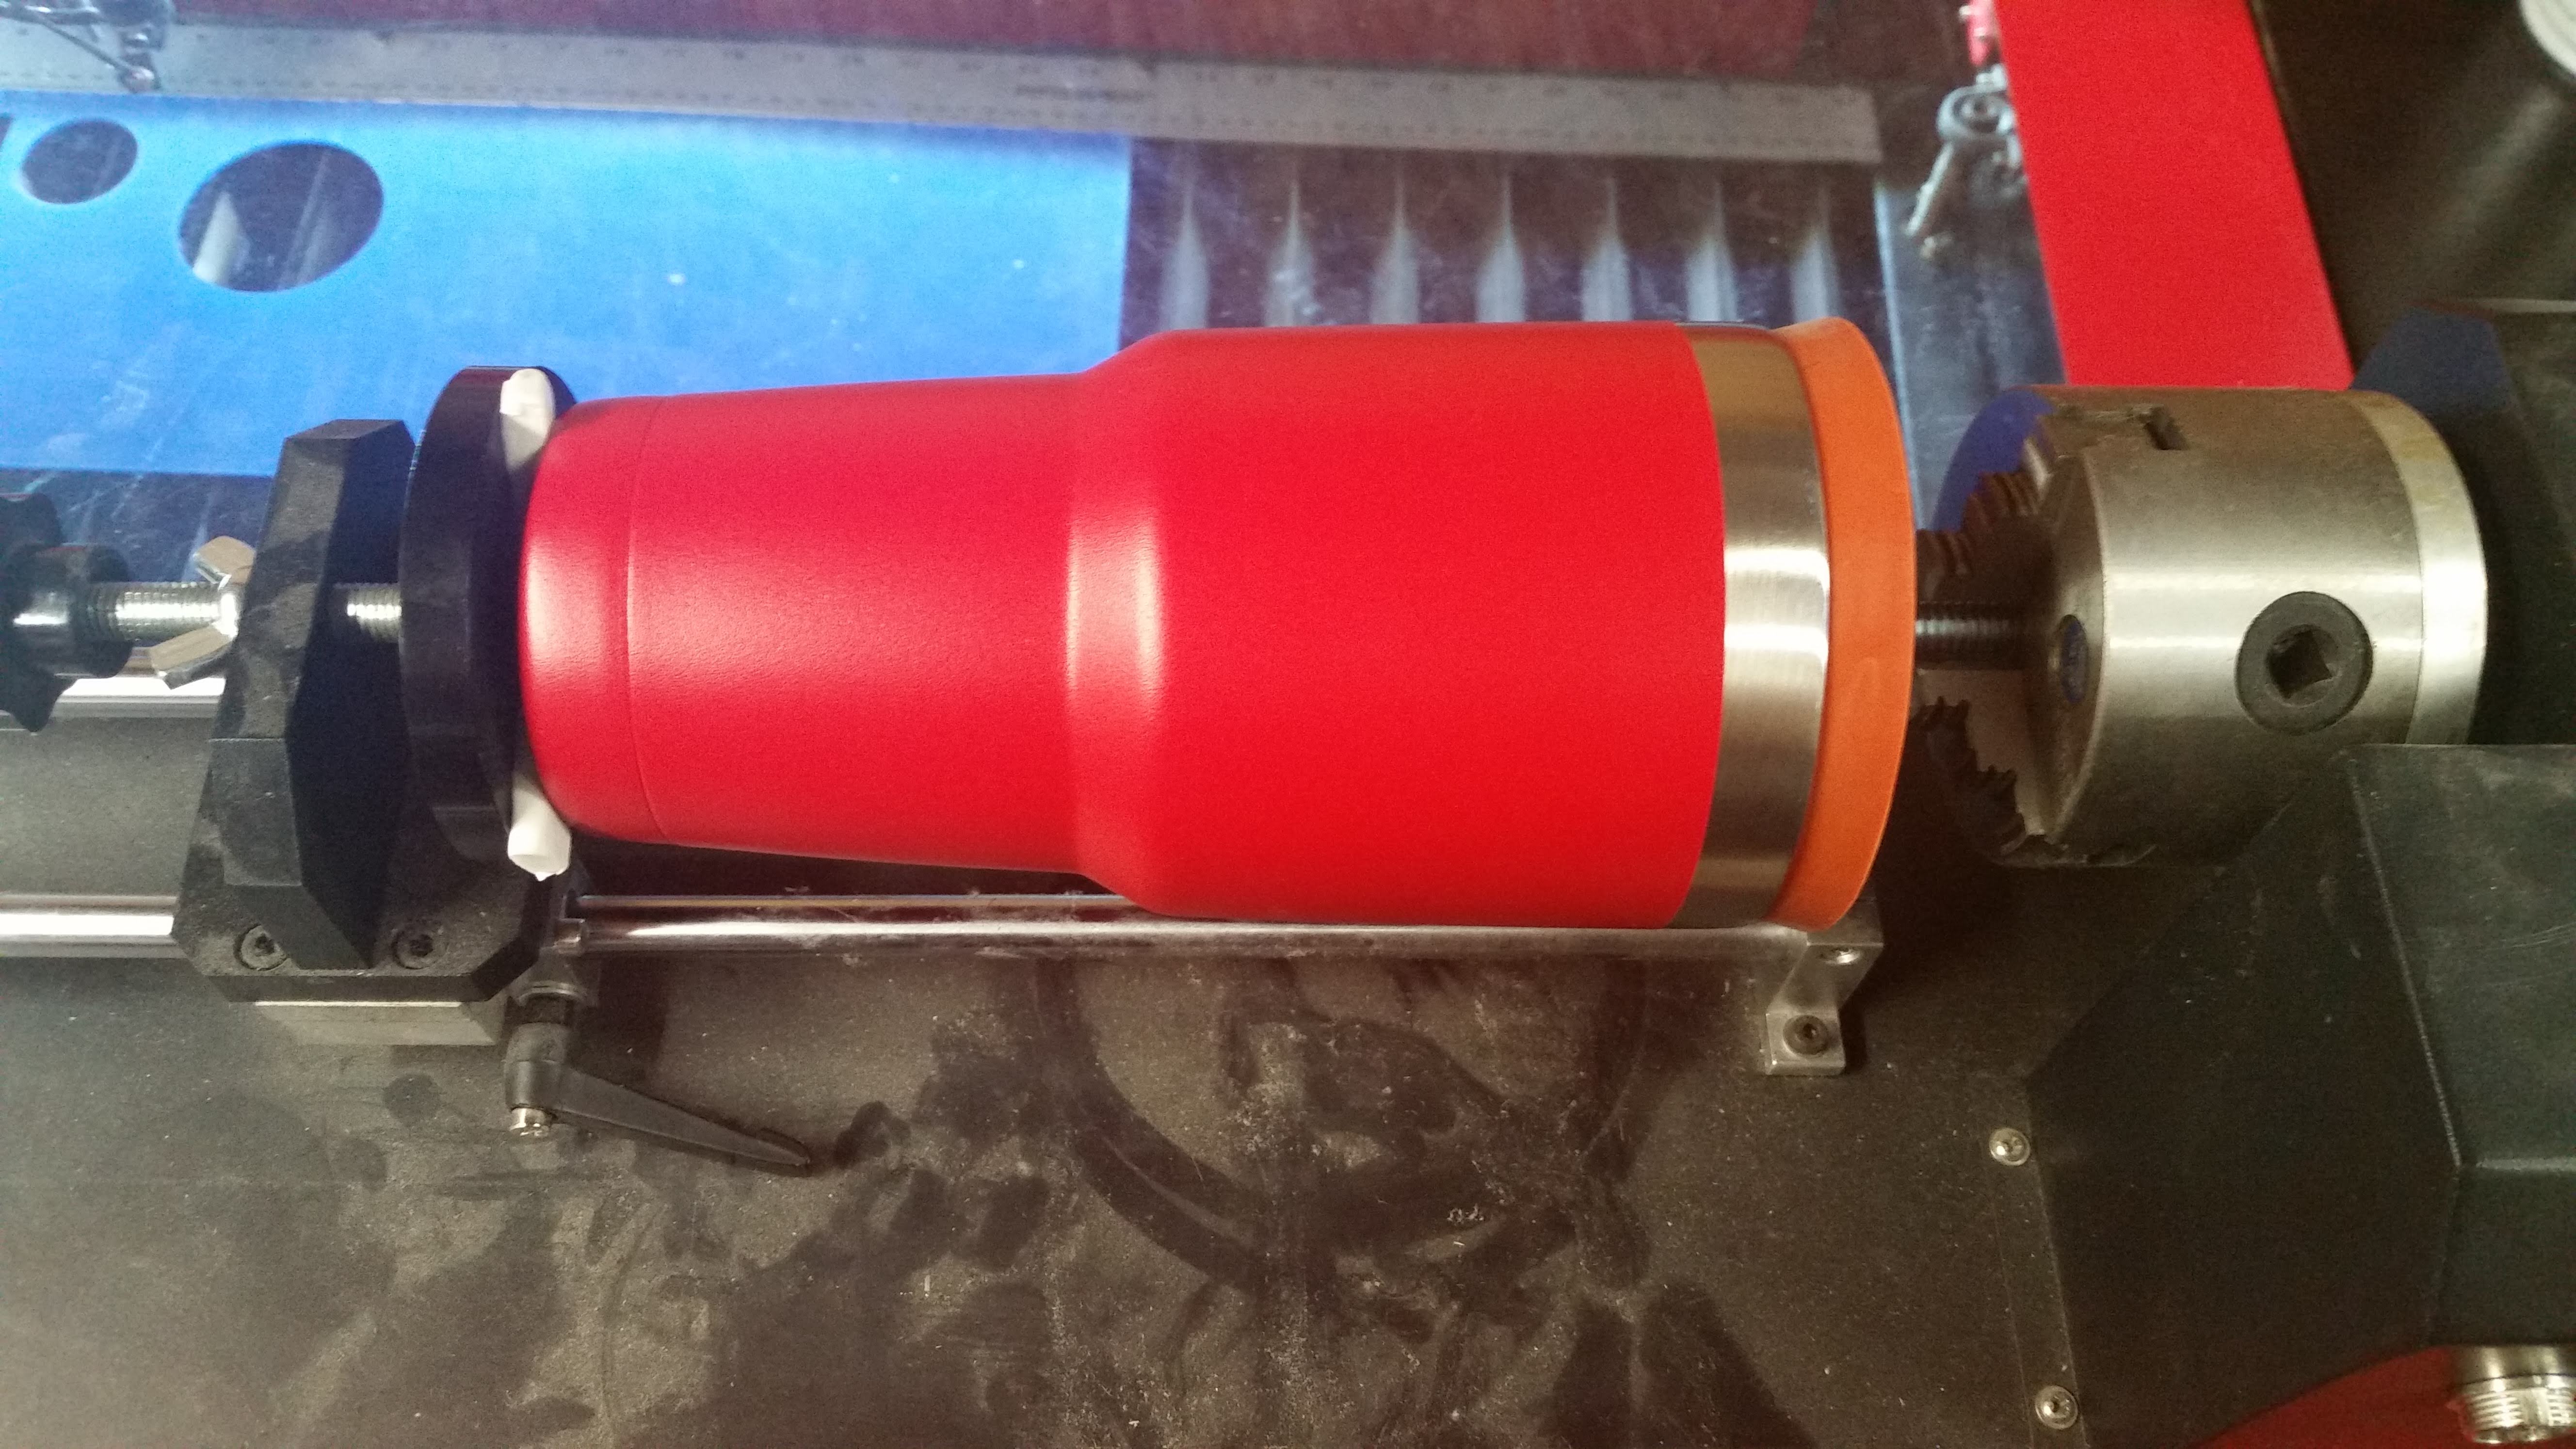
Powder coating plugs can be your friend too!
Since powder coating plugs are made from silicone, they not only have some flex to them but also have some grip. The cone shape is perfect for openings of various sizes within the plugs limitations. Since there are quite a few sizes of plugs we picked up a variety.
The largest was a #15 which is 3 1/2″x 4″ (cone diameter) or 84mm x 102mm.
We also picked up sizes: #14, #13, #12, & #11
So how do you attach them to the chuck?
Silicone is made to take high heat (well in this case up to 600 degrees F) but they can be cut by a laser cutter.
For each plug size we measured the smaller diameter end and then made a jig to hold it during laser processing. Really it is a simple as cutting the right sized hole in a substrate the can held in place during the cutting process. We used acrylic scrap that we had from another project.
We have a 100W laser and it took quite a few passes to cut through the silicone that was between 10mm thick for the #11 plug and 14mm thick for the #15 plug
After about 4 cutting passes, we removed the plug from the jig and blew out the cut with compressed air, then lowered the head to drop the focal point lower into the silicone. We repeated the process until we had a hole in the center.
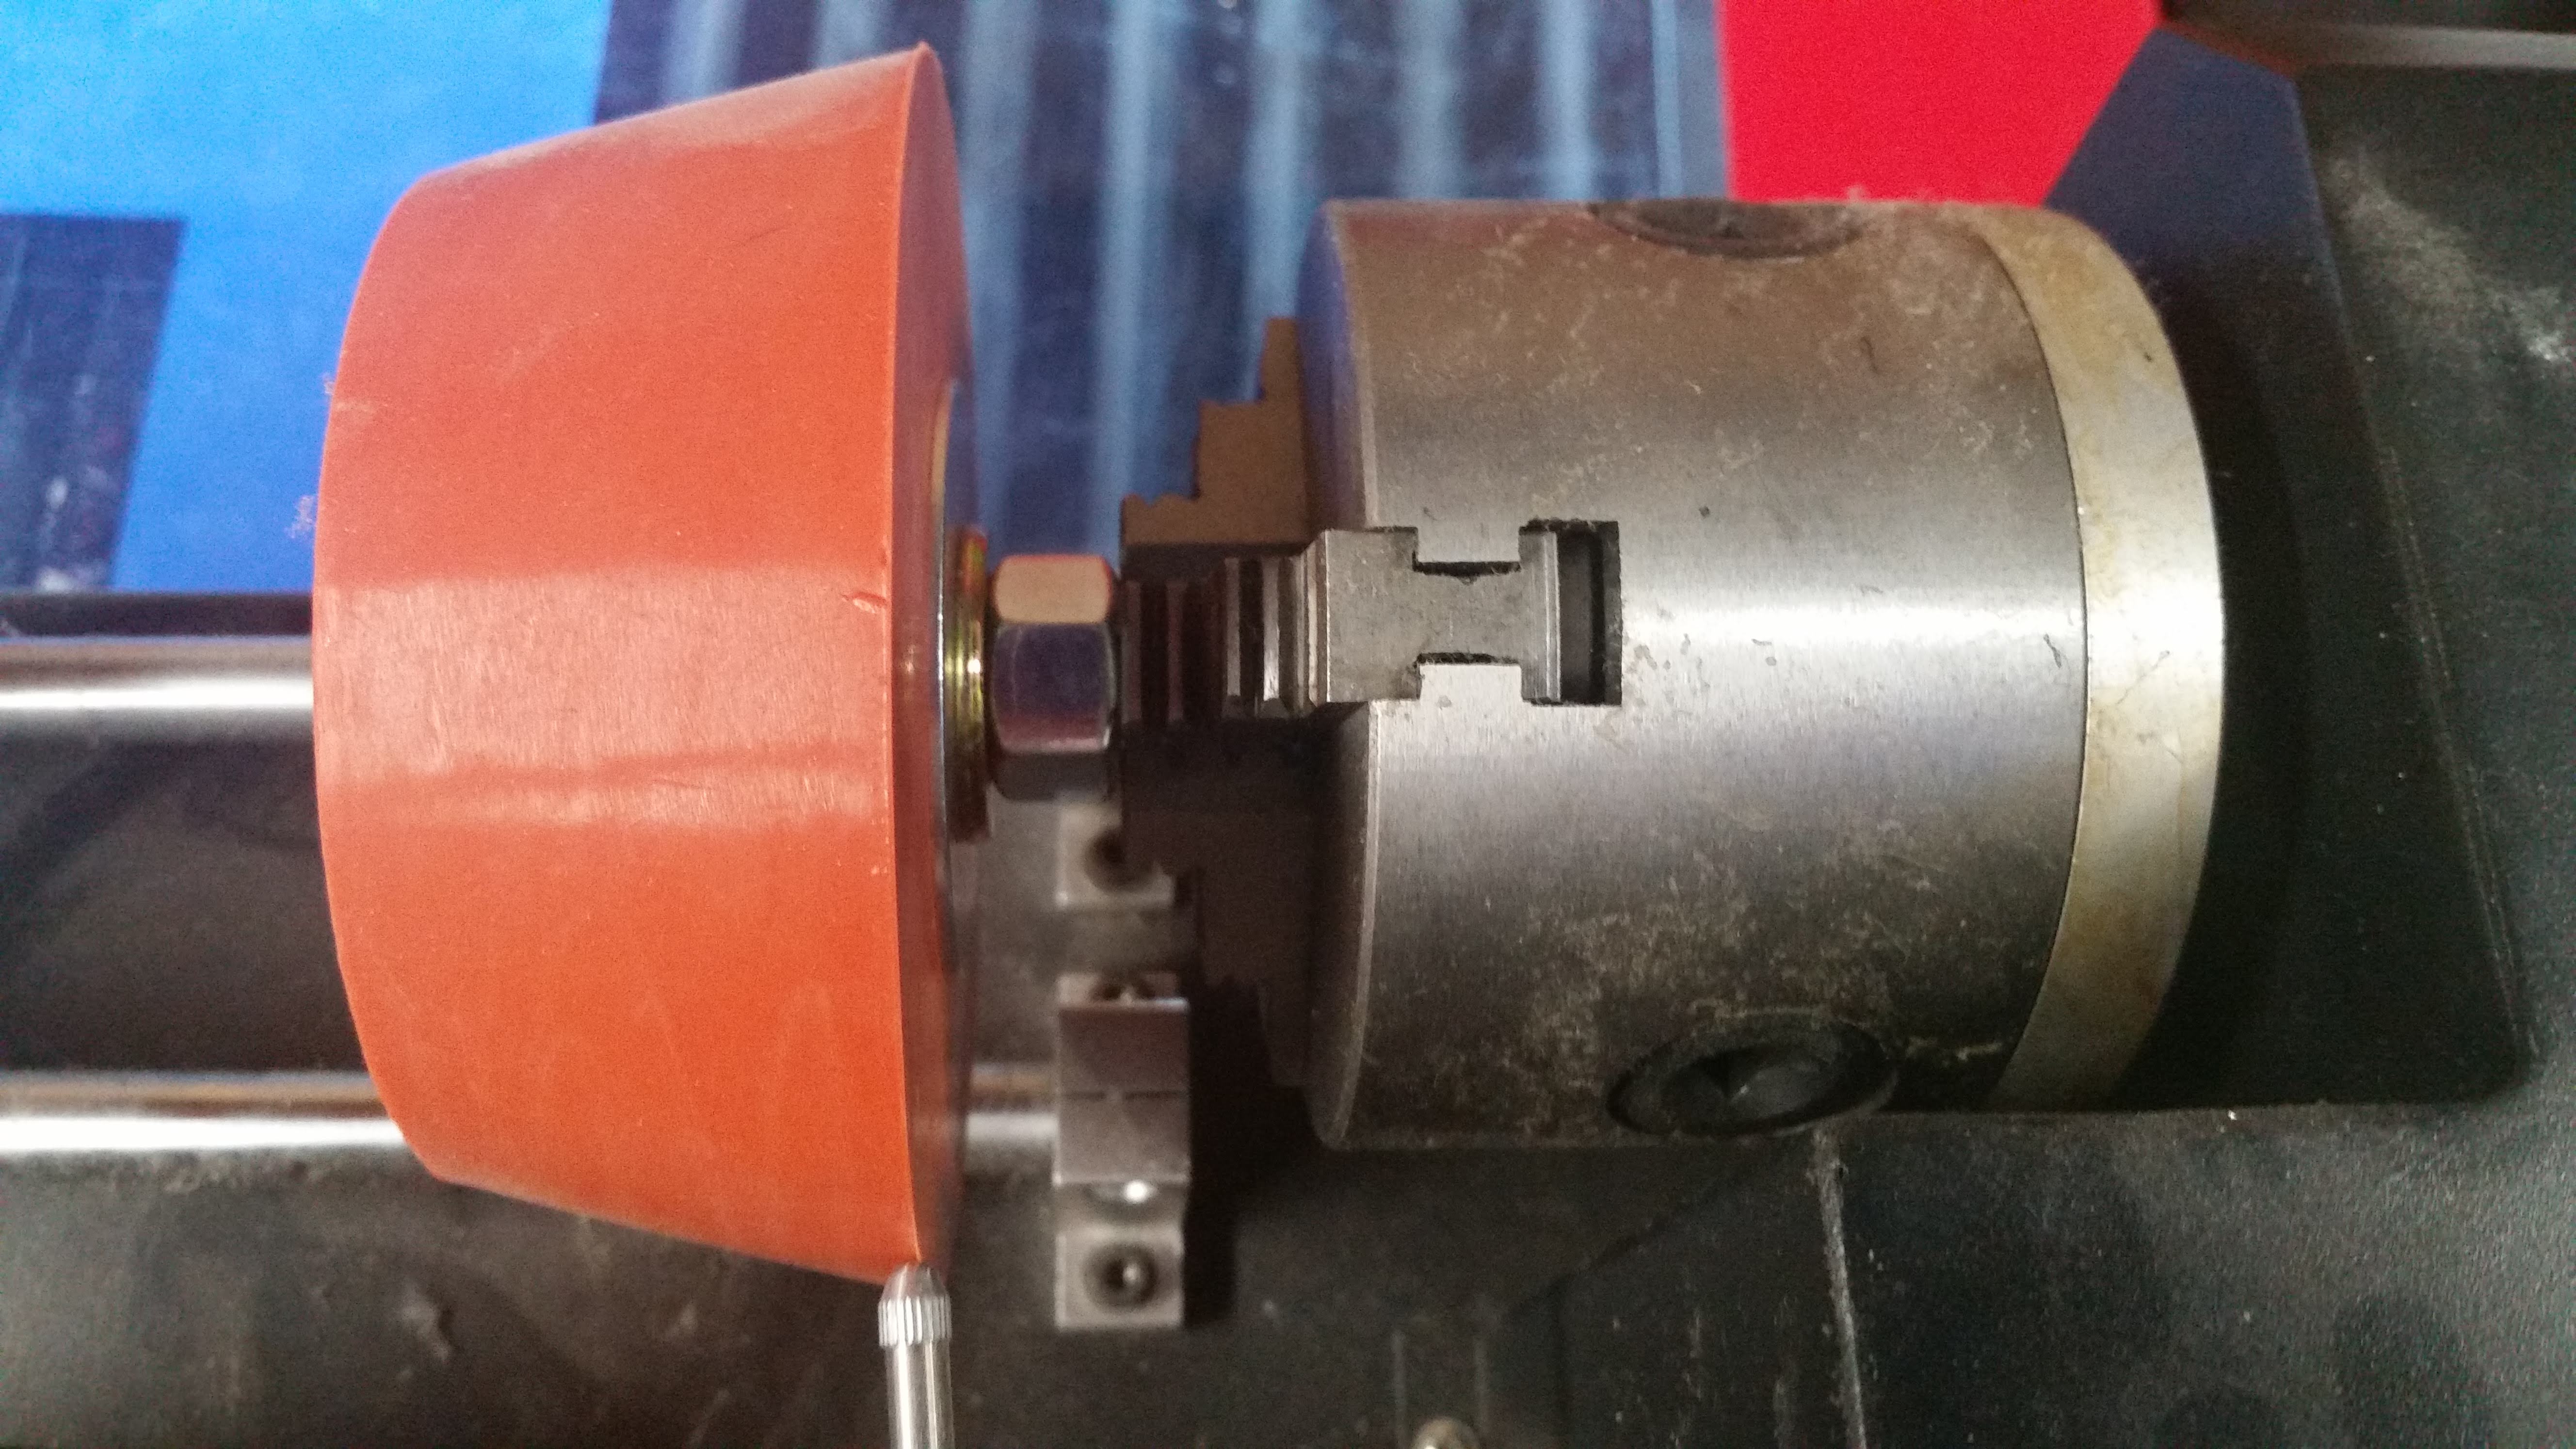
After the hole is cut in the plug we put a fender washer on each side of the plug top (where the hole is), put a bolt through the washers, and put a nut on the bolt only loosely tightening the nut.
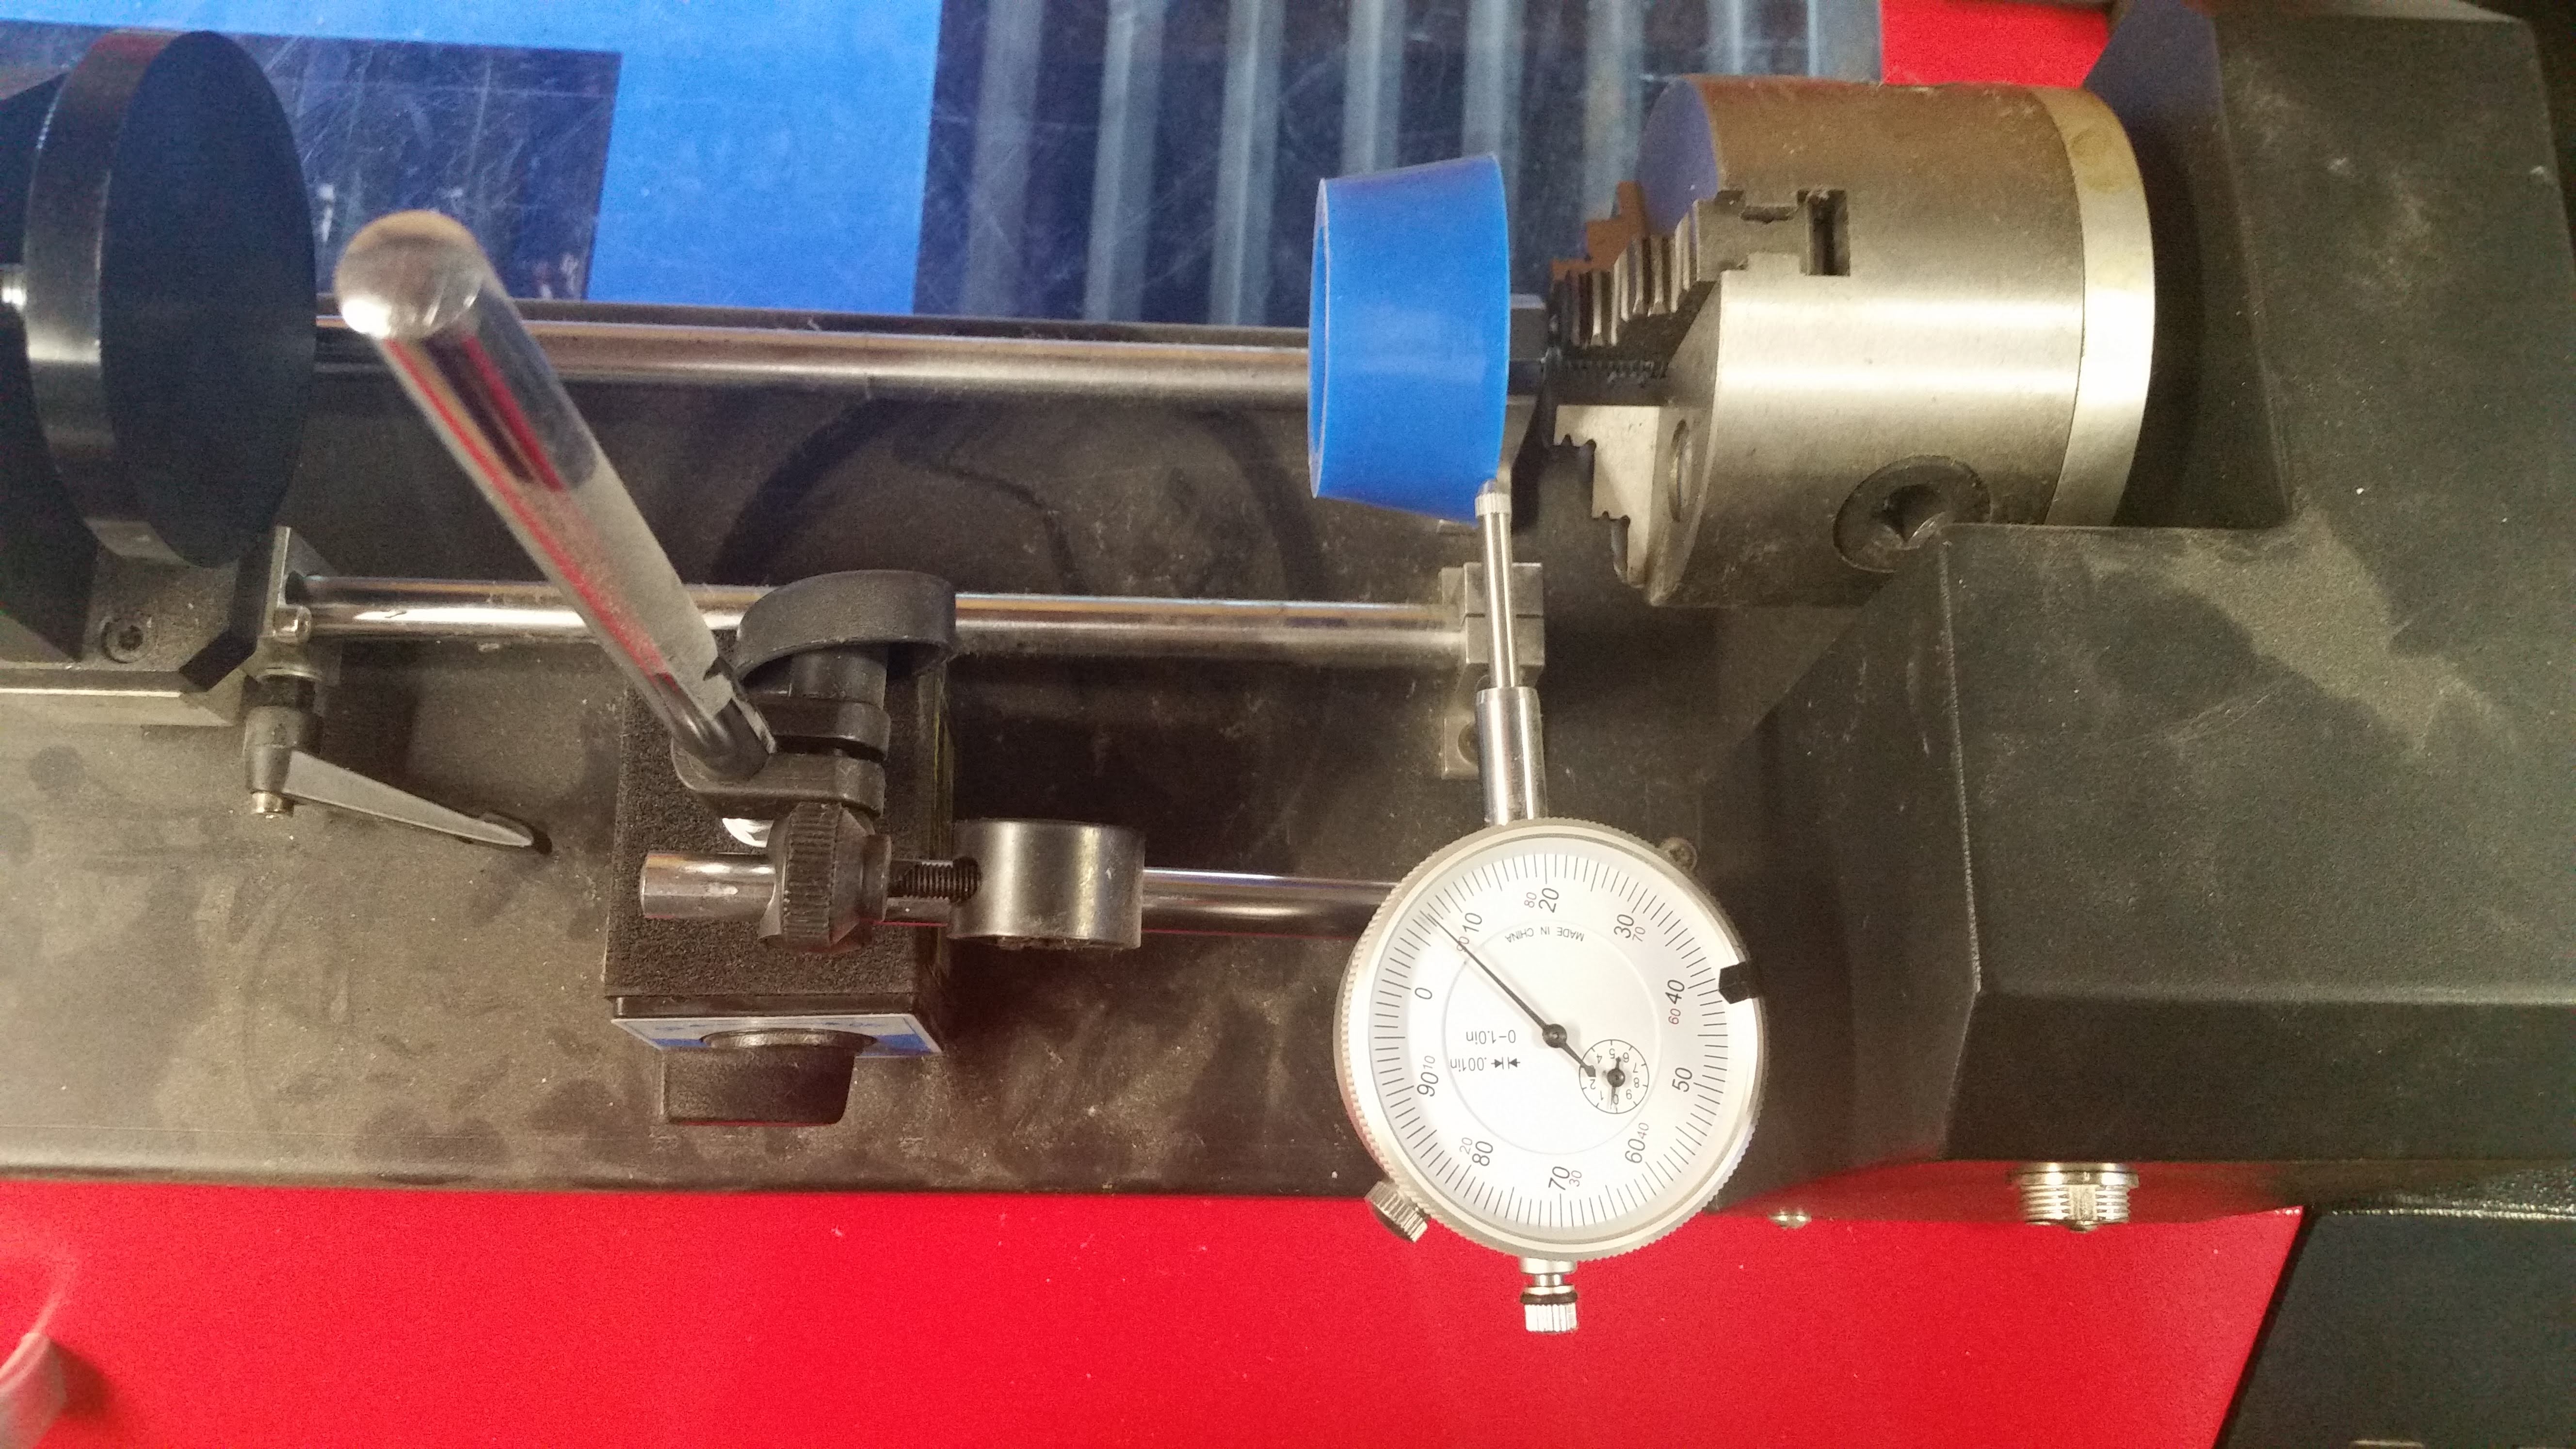
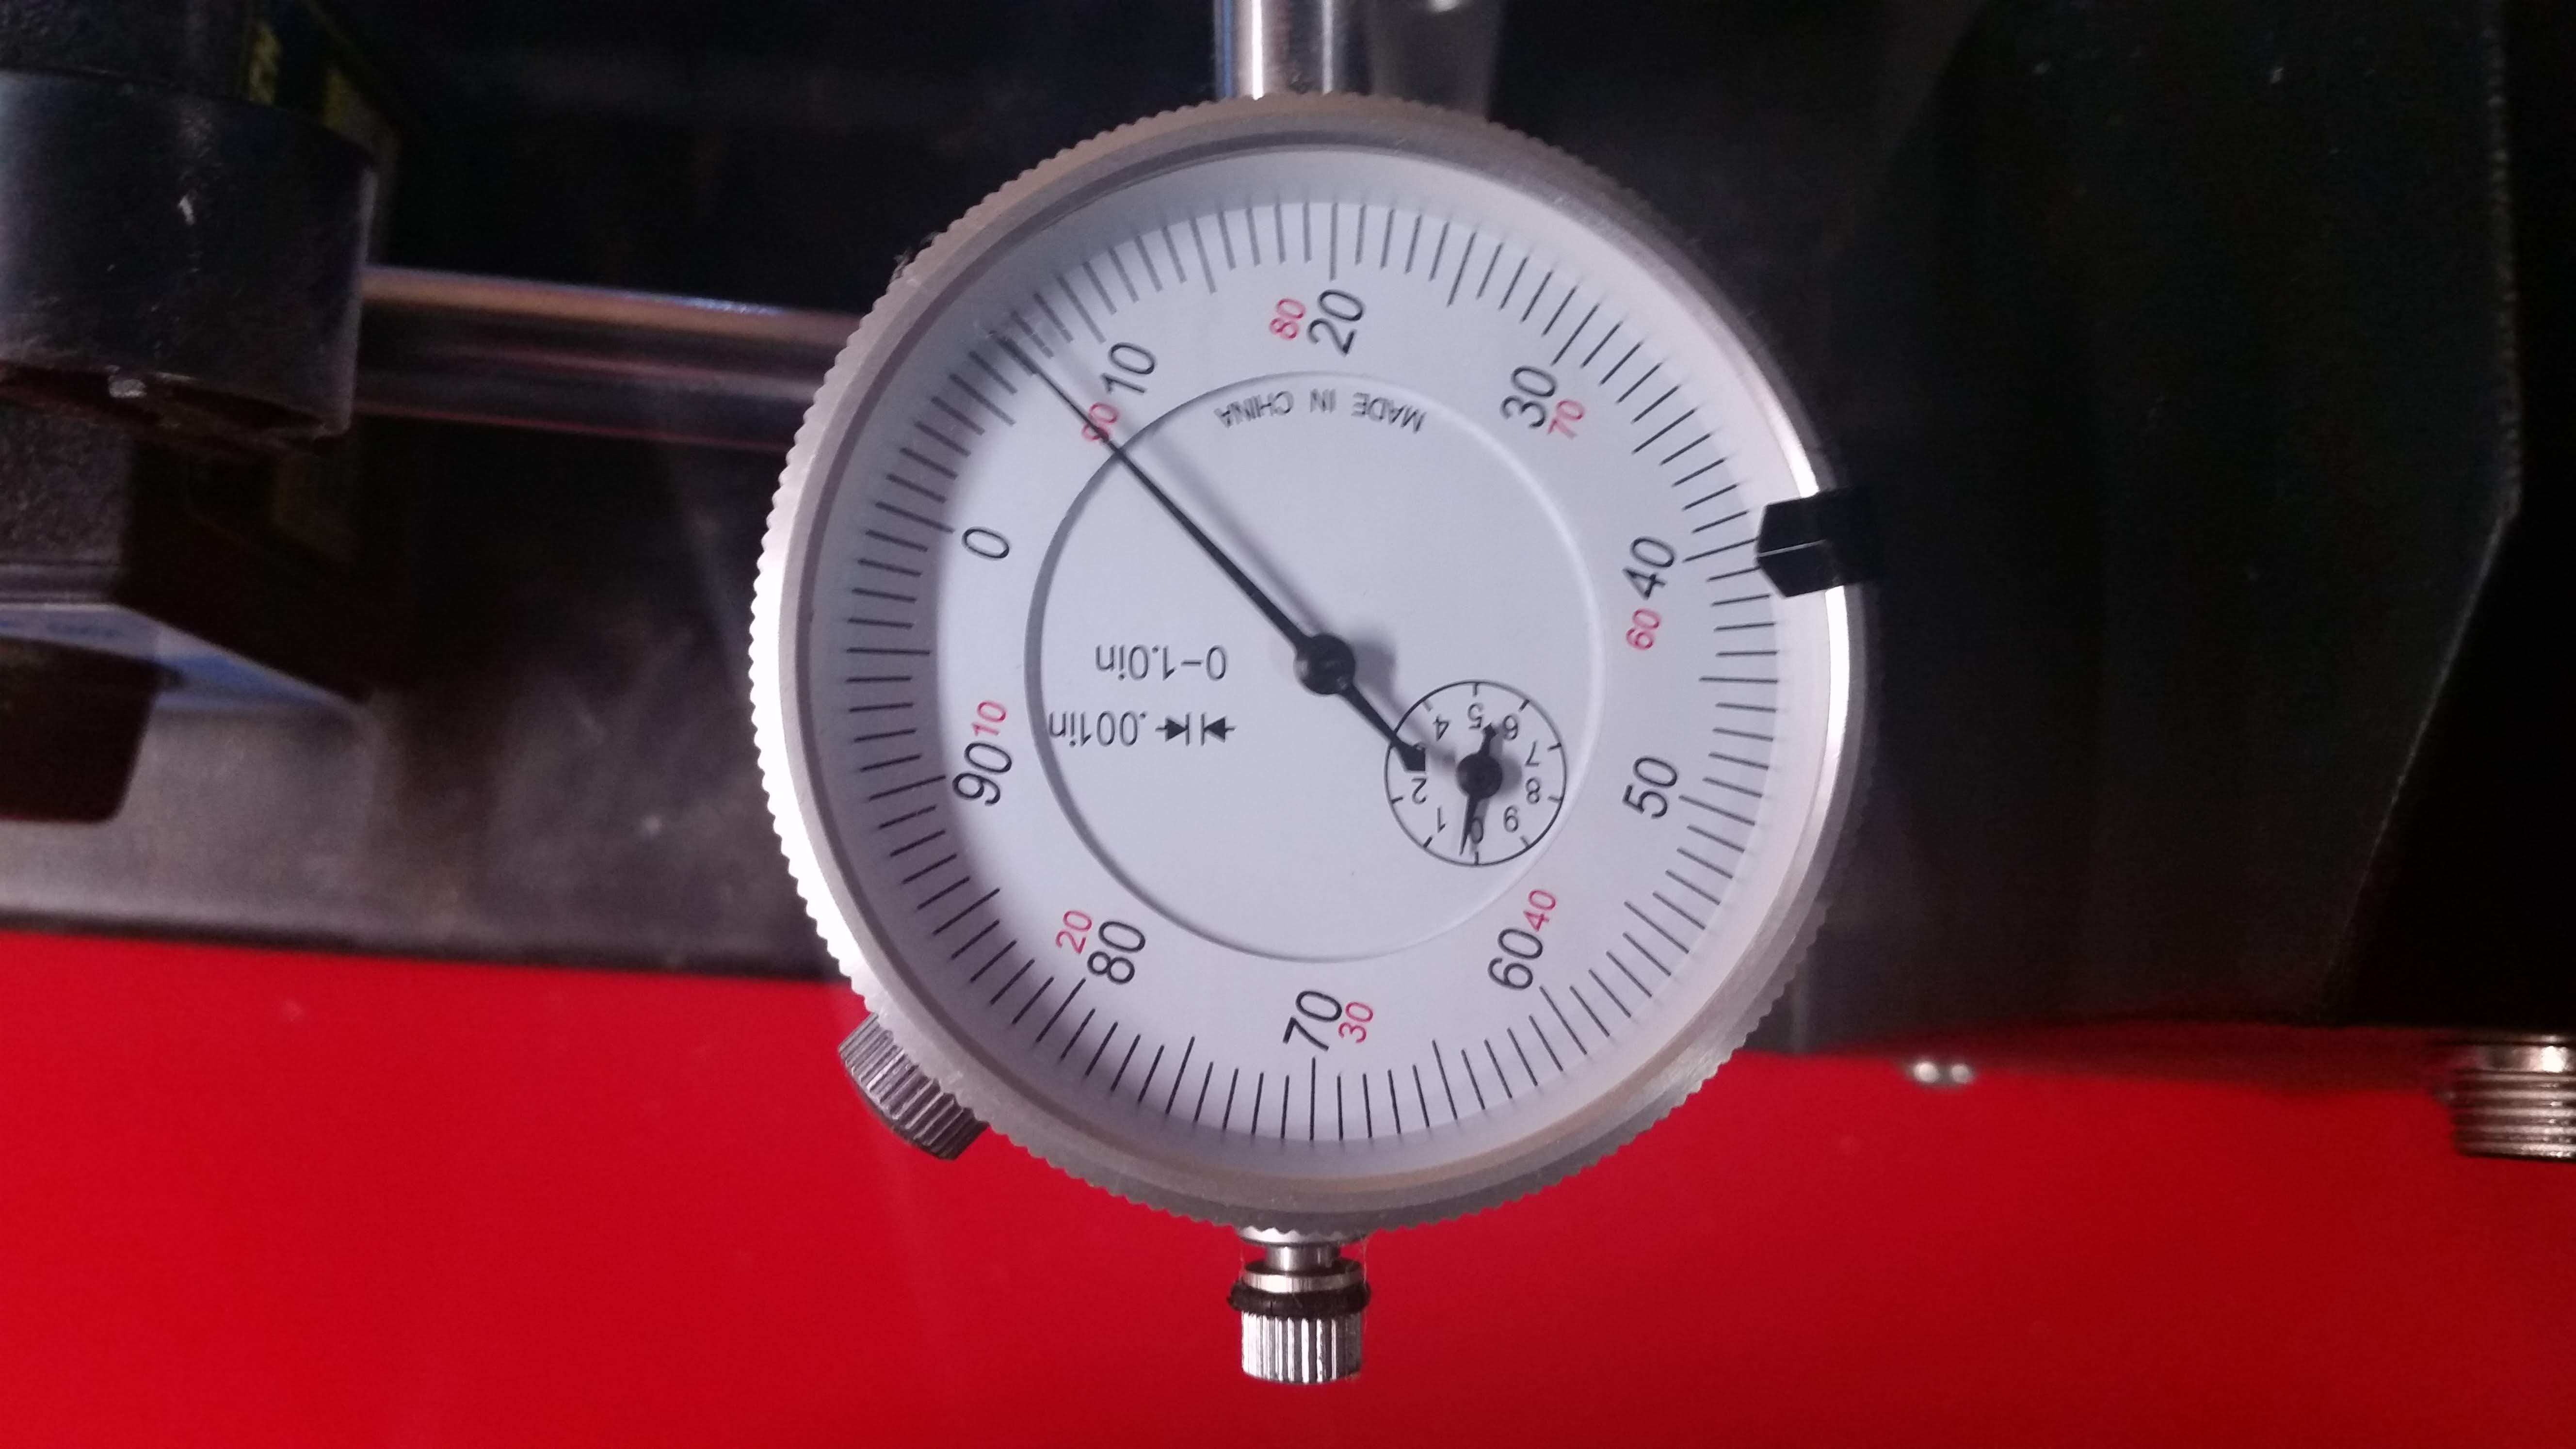
We then chucked the threaded end of the bolt into a drill to check for run-out (wobble) and adjusted as needed before snugging down the nut.
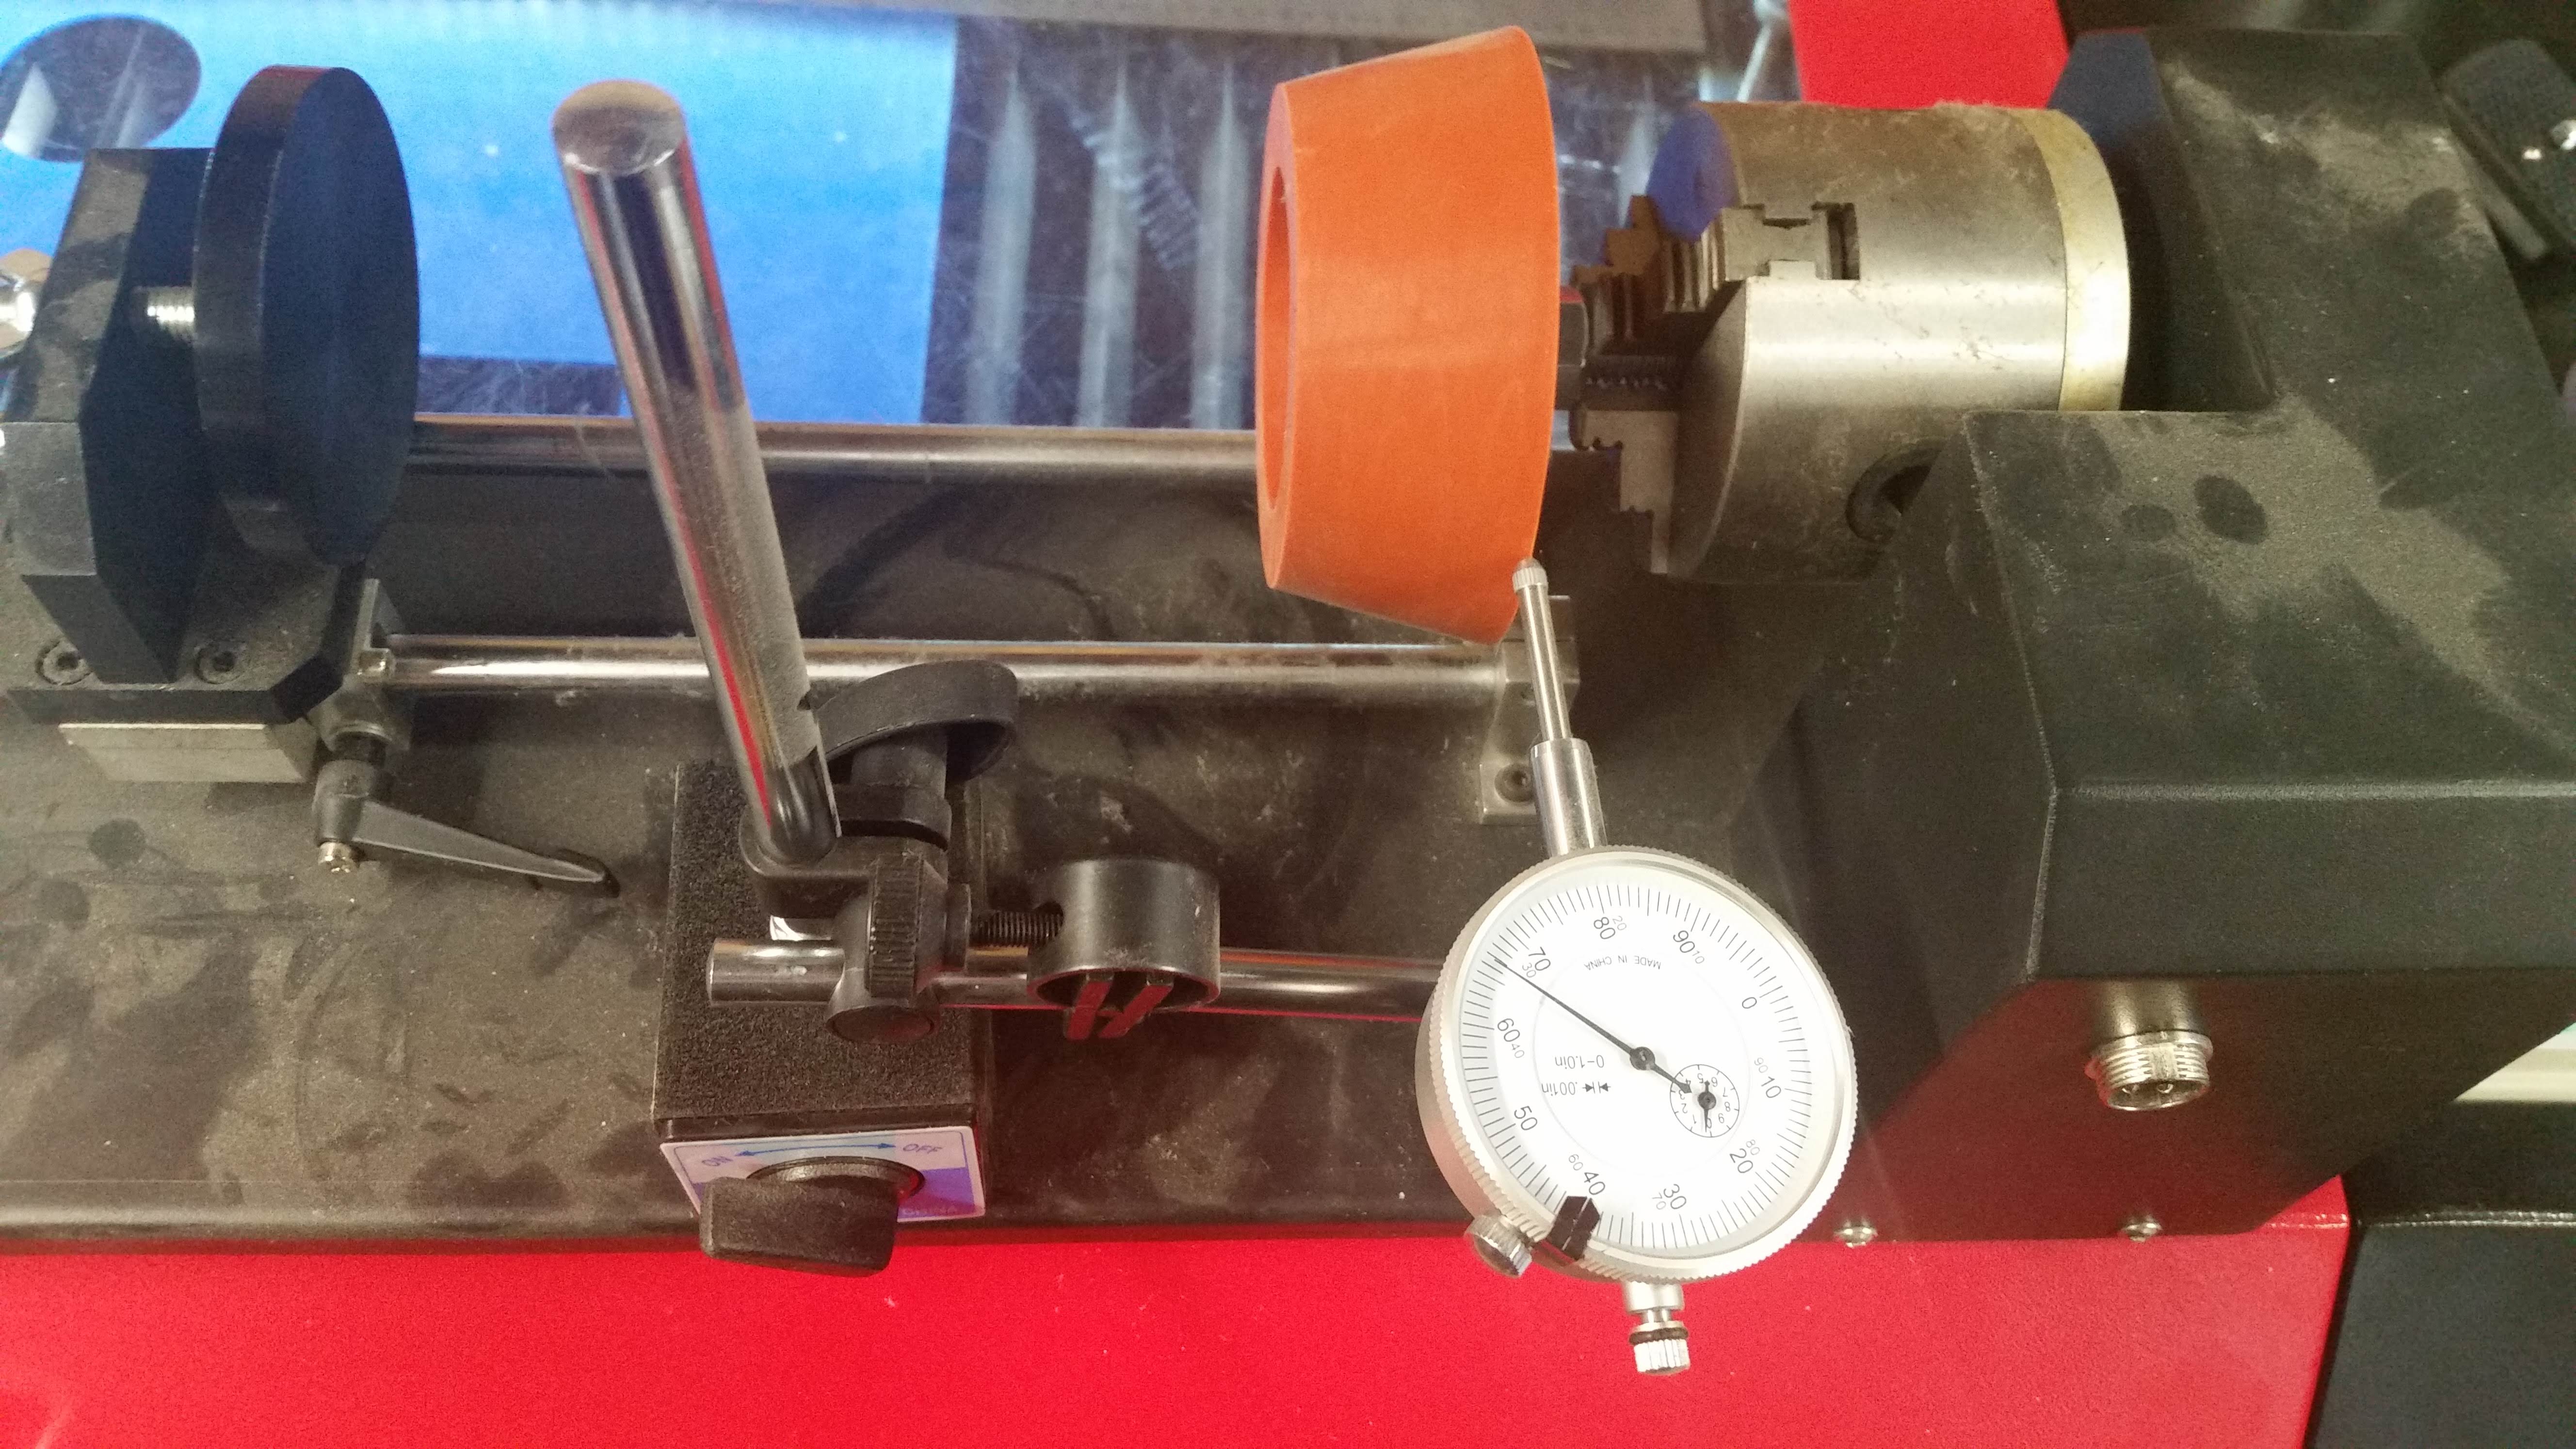
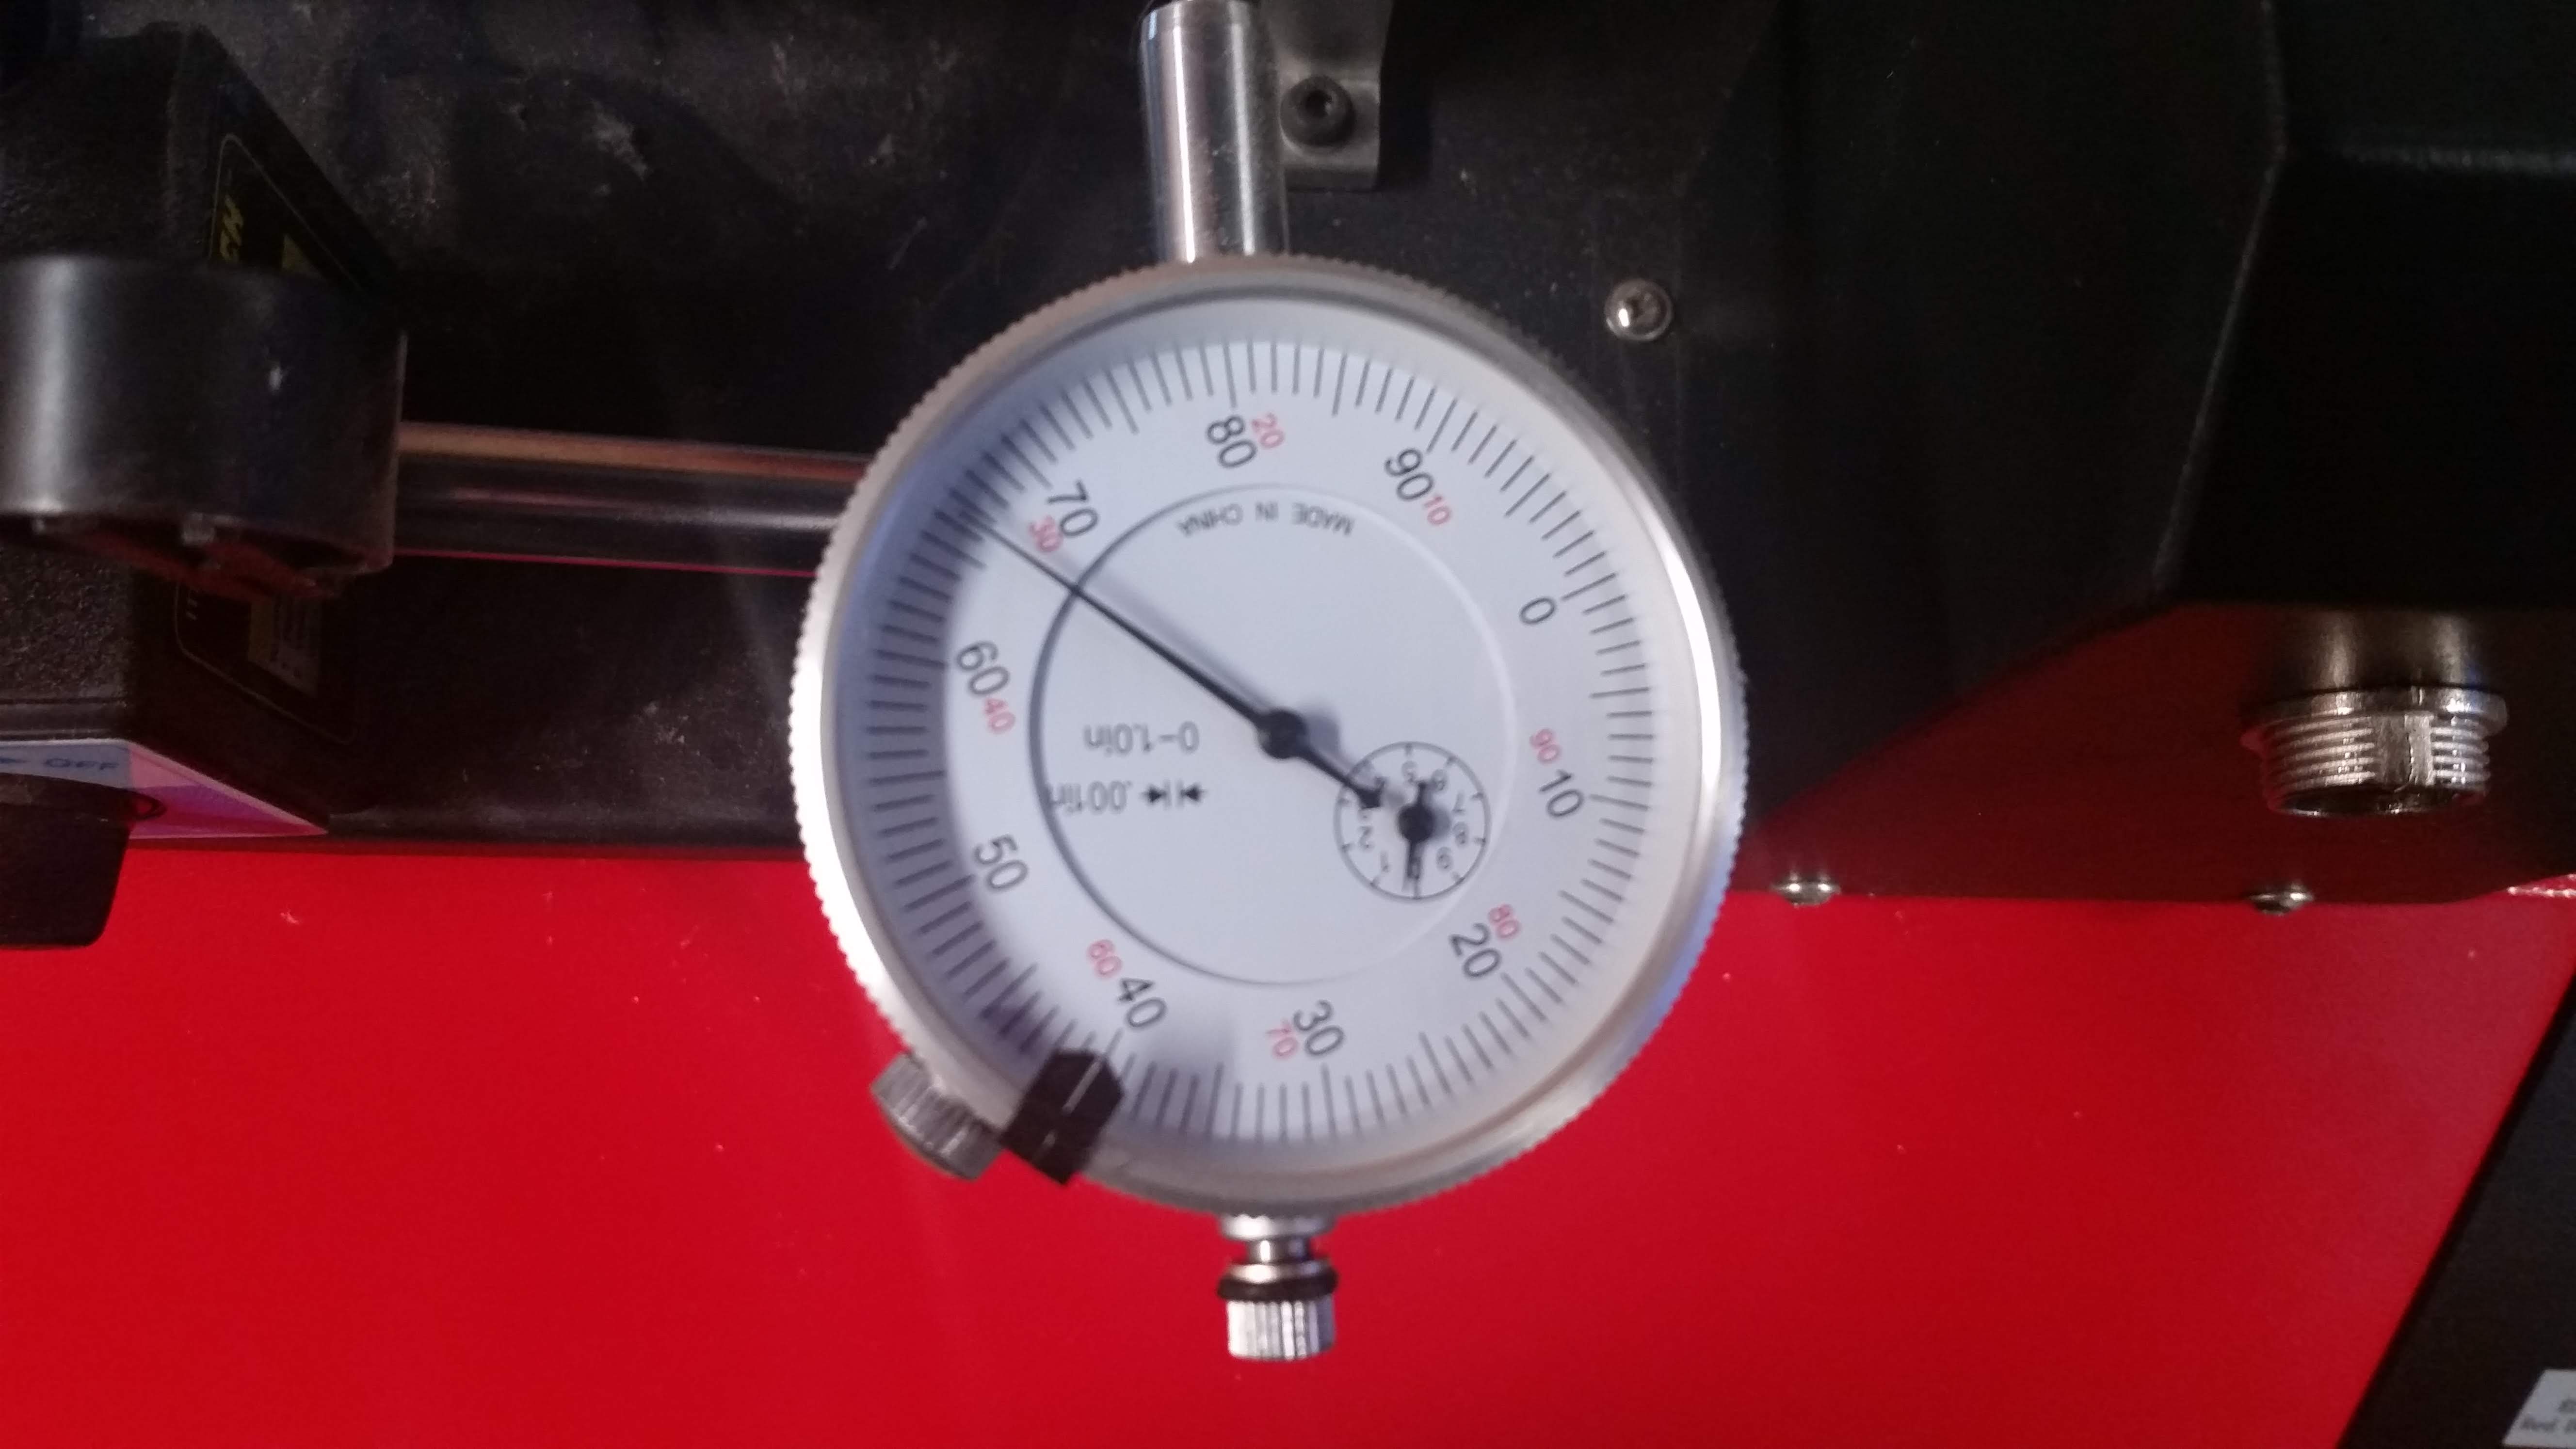
Results
As you can see from the images above we were pretty happy with the results. We did use a dial indicator to get an idea of about how much run-out we really had at the large diameter end. Given that these are made in molds that are not always of the highest quality we were surprised to see that our largest measurement was .0335″ for the large plug and only .006″ for the #11.
Since we are using a 2.5″ focal length lens, these should work out pretty well.
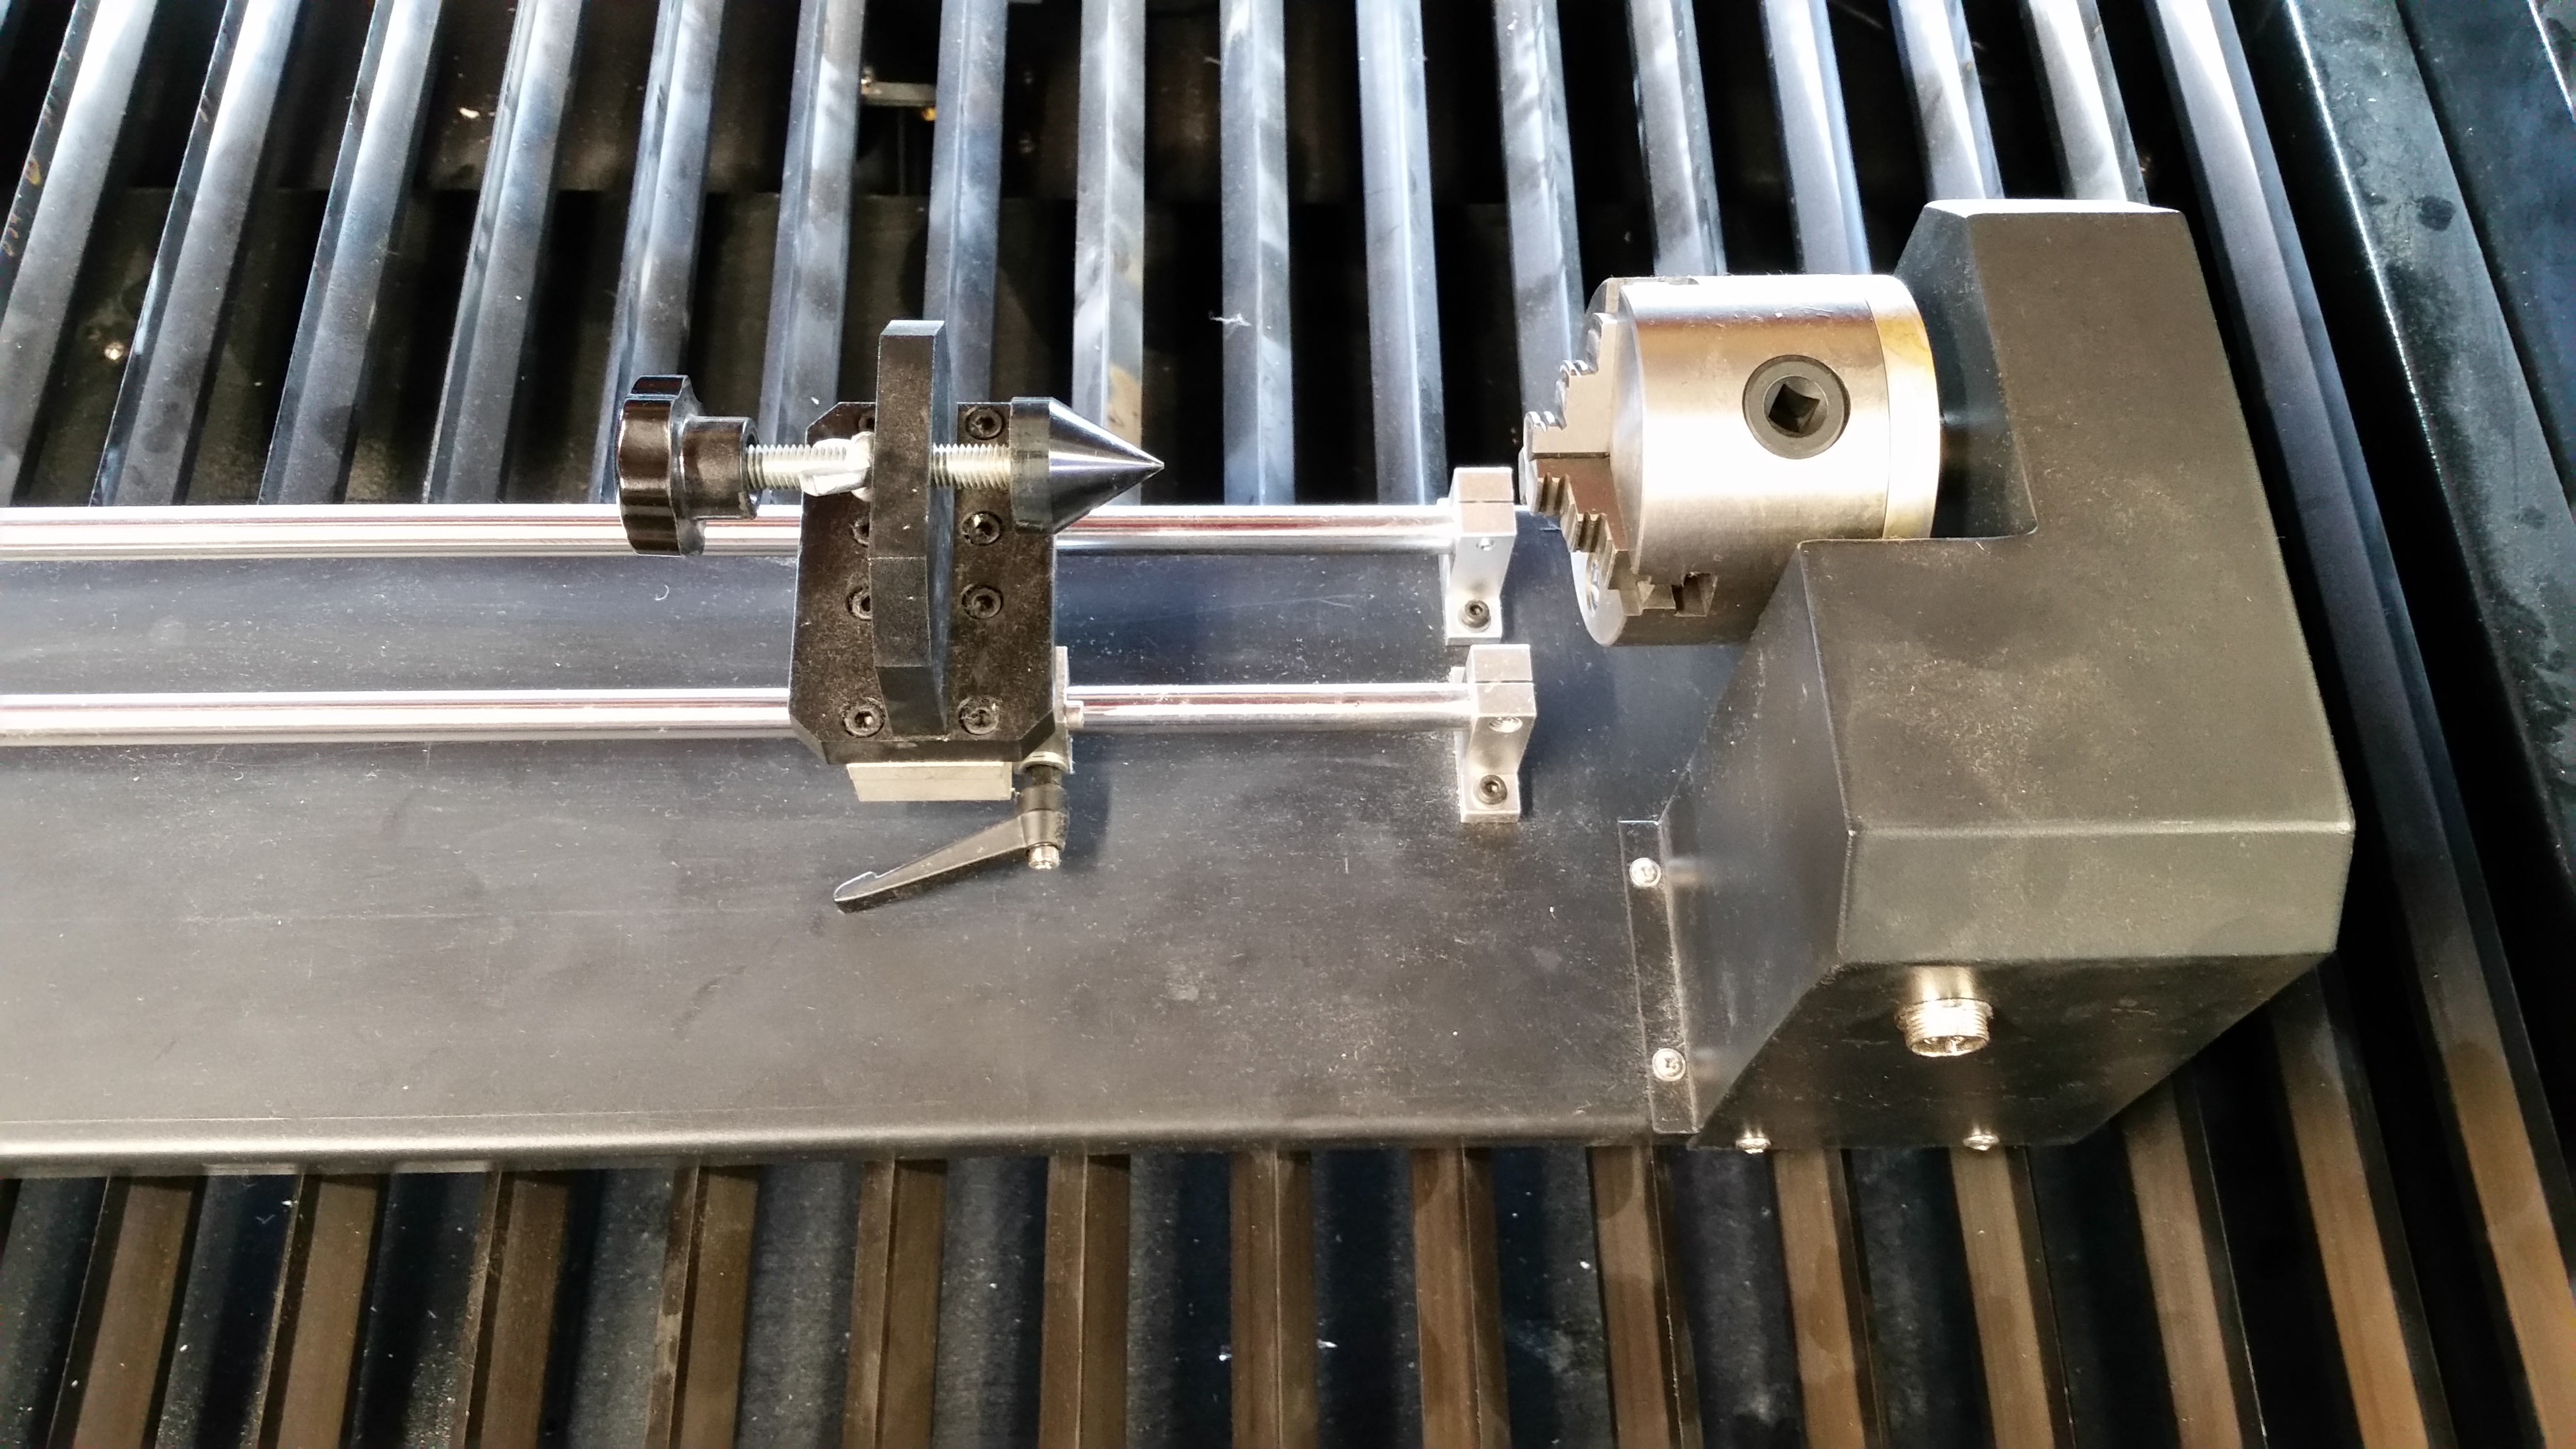
You can see our cutting jig in the background
Want a set of your own?
Want a set of these for your very own, but don't want to make them? We can make some for you!